.png)
How to Use the New Content Creation & Image Editor In Cloud Campaign

October 15, 2024
5 min read

CONTENTS


We’re excited to announce some major upgrades to how you create content in Cloud Campaign.
In this post, we’ll explore these new features of our re-designed content creation workflow. Want to see a video walkthrough? Click here to check out our in-depth video guide!
We get that change can be disruptive, so we wanted to take some time to walk you through the new experience so you can get back to being your regular ‘ol productive self.
The major benefit of this re-design is that it streamlines the content creation process and makes using Cloud Campaign’s automation features more accessible.
This update also introduces powerful new image editing capabilities, allowing users to apply a variety of edits, filters, frames, text elements - and more - without having to switch between apps or devices.
Let’s dive in! And if you want to follow along, click here to log into your account now. New to Cloud Campaign and want to explore these features? Click here to start a two week free trial and explore with us!
Accessing the New Workflow
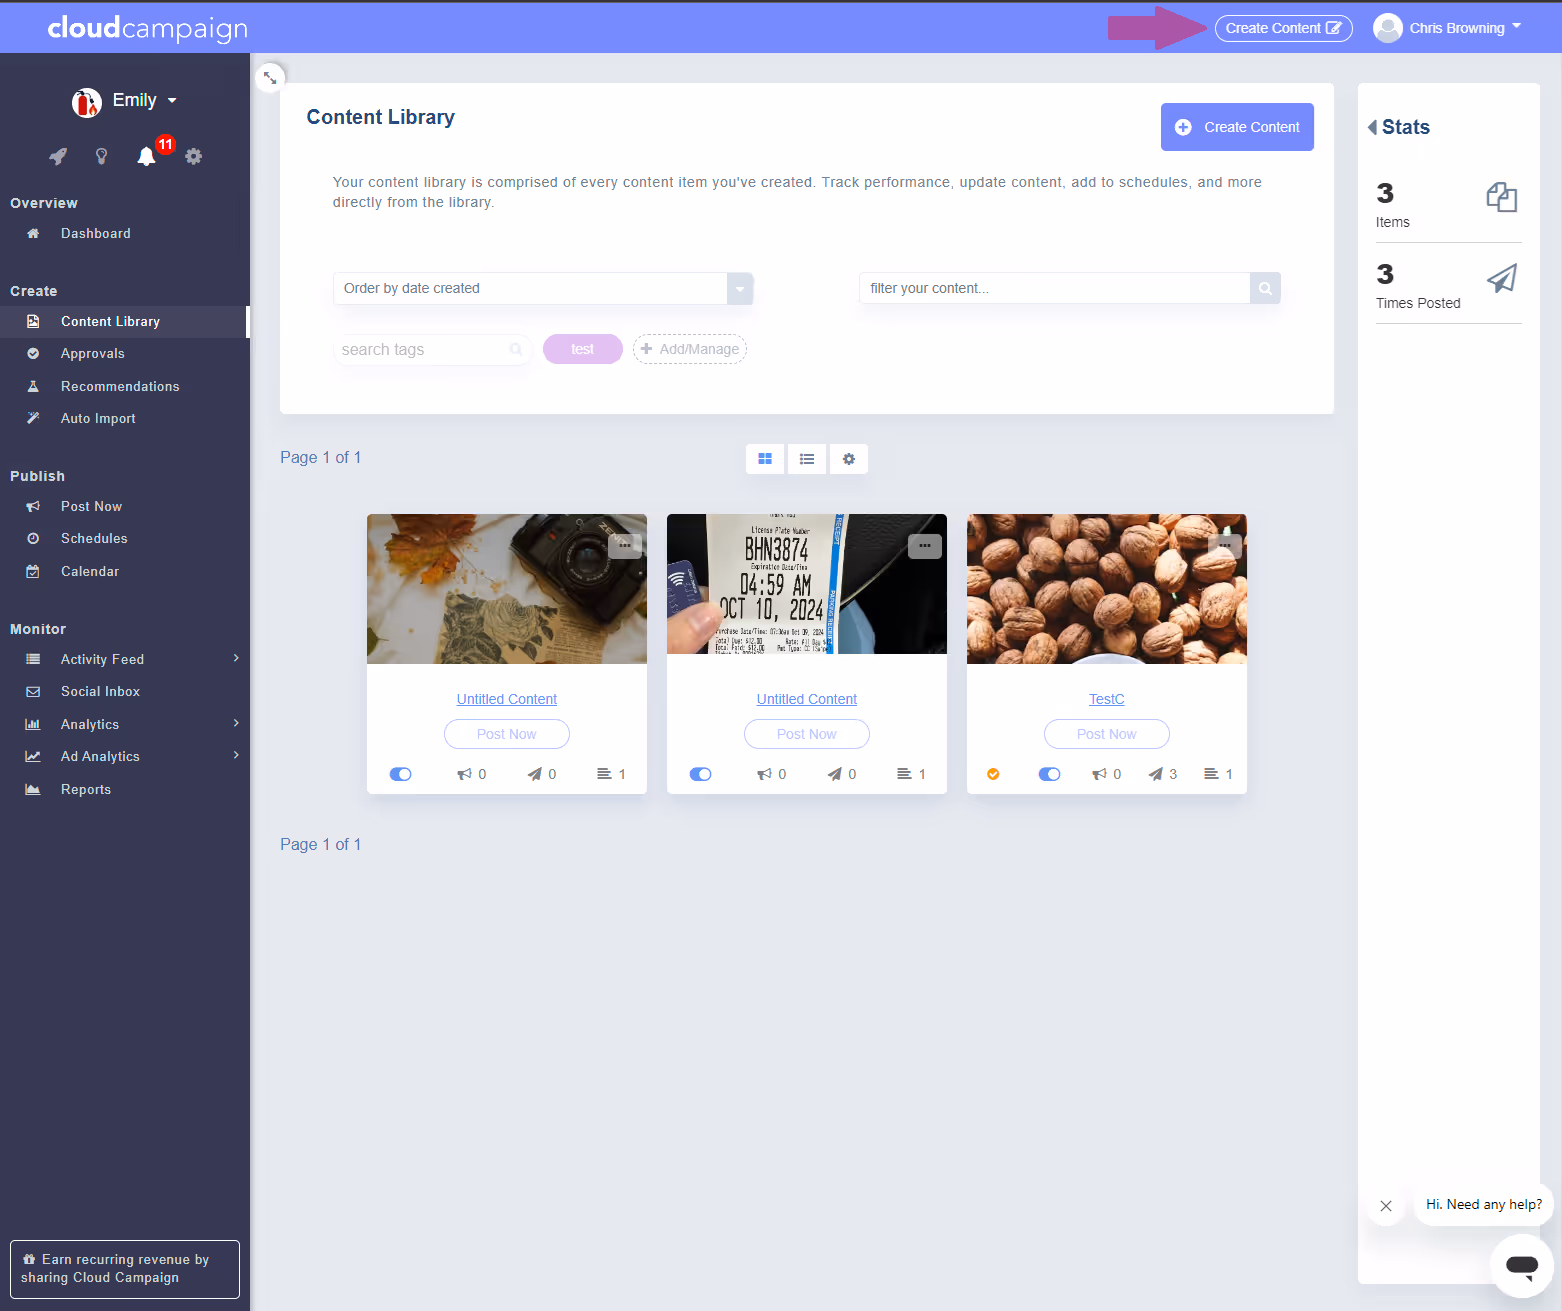
Check out this new button in your top navbar. You can use this button to quickly access the create content menu, or access it through your Content Library.
Whichever way you click, you’ll now see three create content options - Post, Story, and Cover Photo.

Notice that the Story and Cover Photo display the Instagram and Facebook icons to inform you that these features are specific to those platforms.
We’ll explore these options more in a bit. For now, we’ll start with the first option - Create Post.
Create Post Content Wizard Walkthrough
Clicking this option will bring up the create content wizard. Let’s walk through this new interface so you can see how it works!
We’ll start by giving our new piece of content a title.

This is what appears in the Content Library and Calendar views, so if you have a specific naming convention for your content - this is where you’d use it.
Next, we’ll select the accounts we want this content to post to.
If you have default accounts set up, those accounts will already be selected for you.
Otherwise, you can manually select platforms and accounts to post to here.
Next, we’ll select our media. This can be an image, video, or hyperlink.
With this redesign, we’ve also introduced drag-and-drop functionality for images, making it even faster to upload your content.
Just make sure that your images are JPEGs and that each image is under 10 megabytes to stay within platform limitations.
You can also search Pexel’s library of free stock images or design custom media in Canva that is imported straight into your content library.
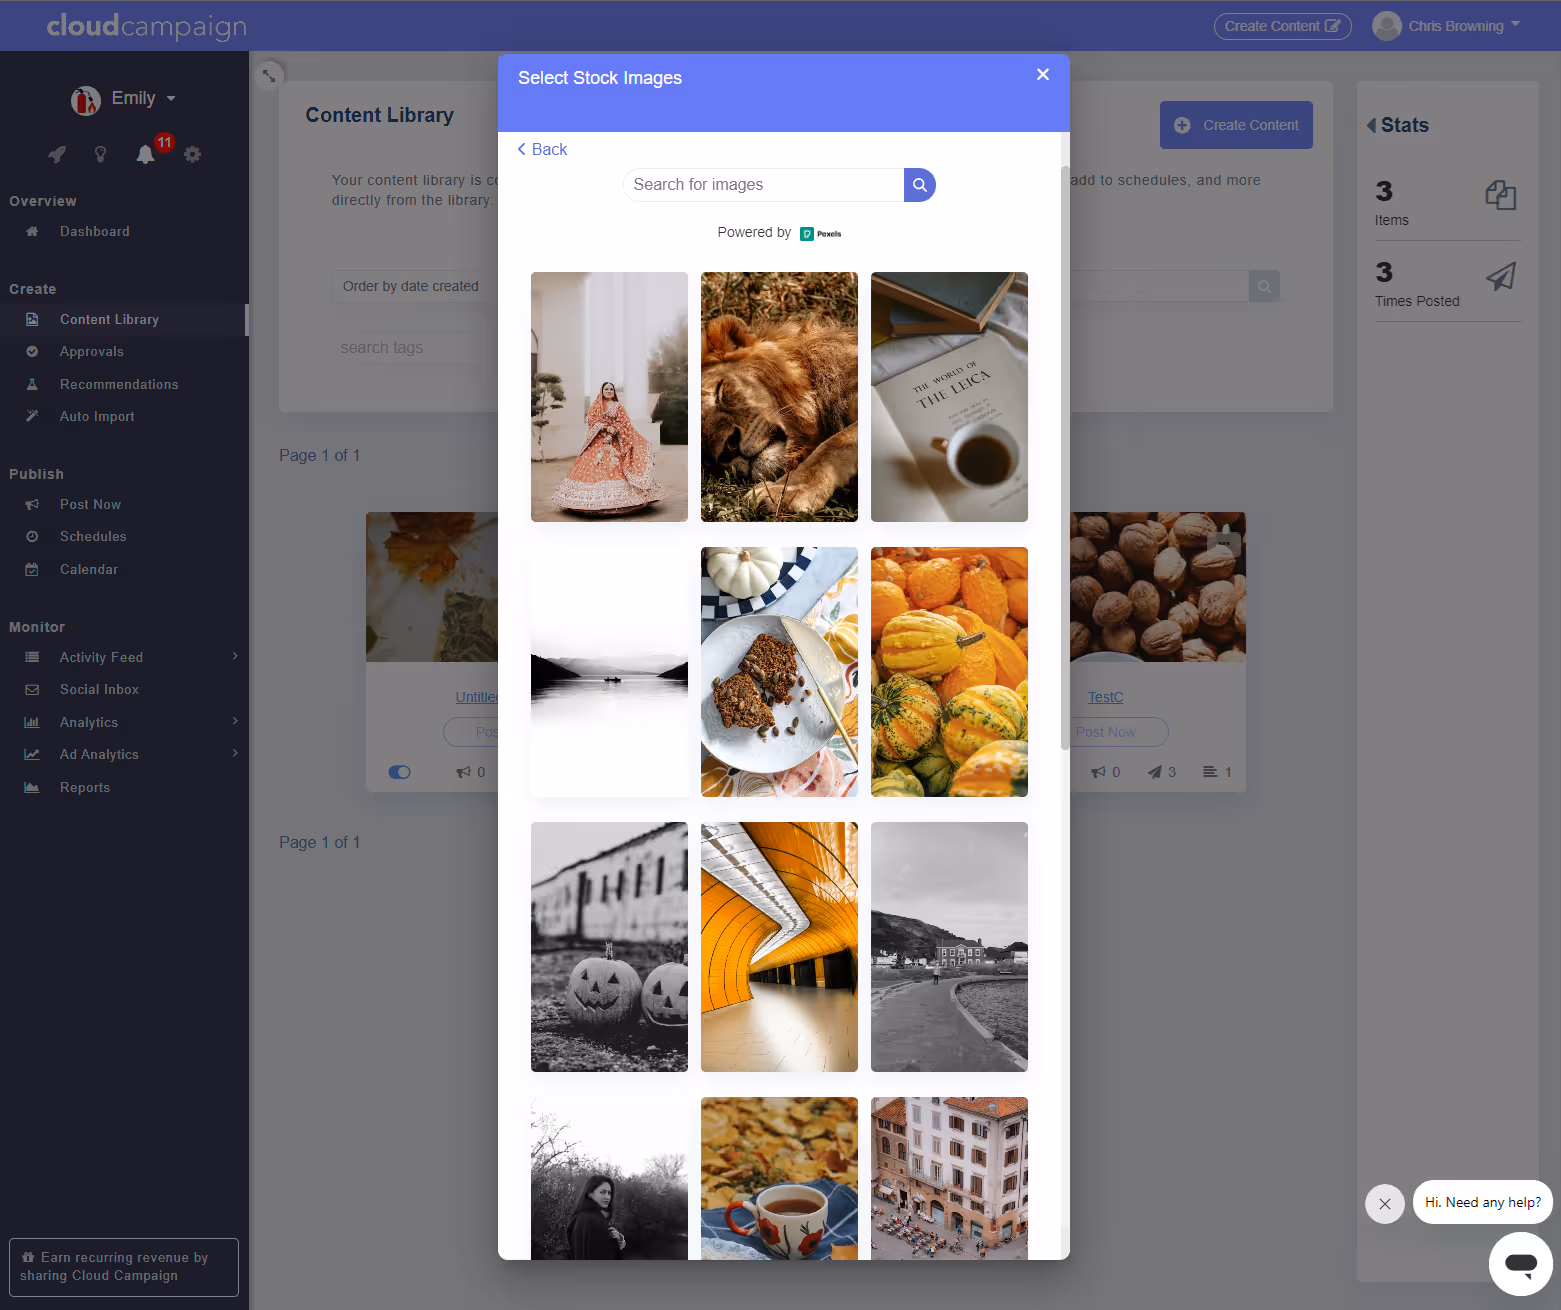

Photo Editor Walkthrough
Once you’ve added an image, you can click the Edit button on the thumbnail to access the new image editor.
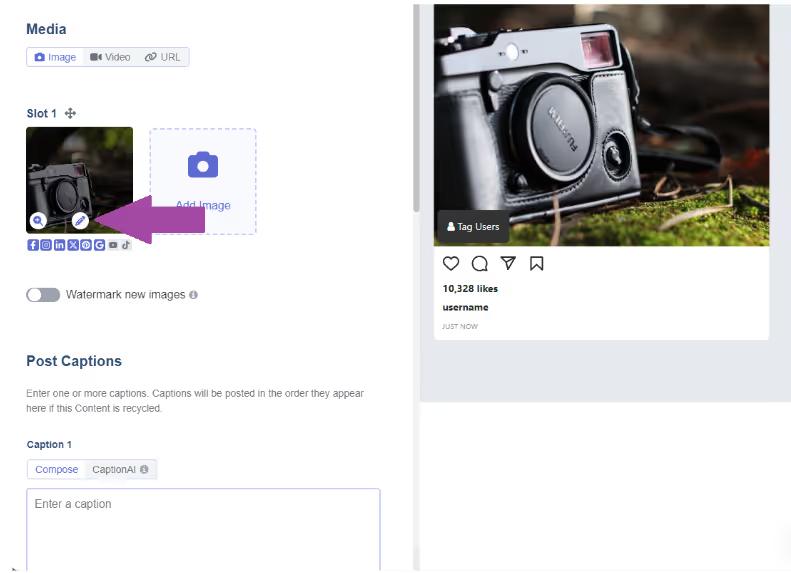
This powerful tool allows you to crop, edit, and add graphical elements to your image.
Let’s walk through what you can do with this tool next.
One of the most requested features from users is the ability to crop images inside the platform.
With this update, you can quickly select pre-set or custom cropping options - including presets for common social media sizes, as well as rotate and flip the image.

You can also select from a range of filters to add a specific look and feel to your images.

The Adjust tool allows you to refine your image further with controls for brightness, contrast, saturation, and all the options you’d expect to see in a photo editing app.

The Focus tool lets you apply a range of blur effects to your photos - perfect for directing focus to a certain area of an image.

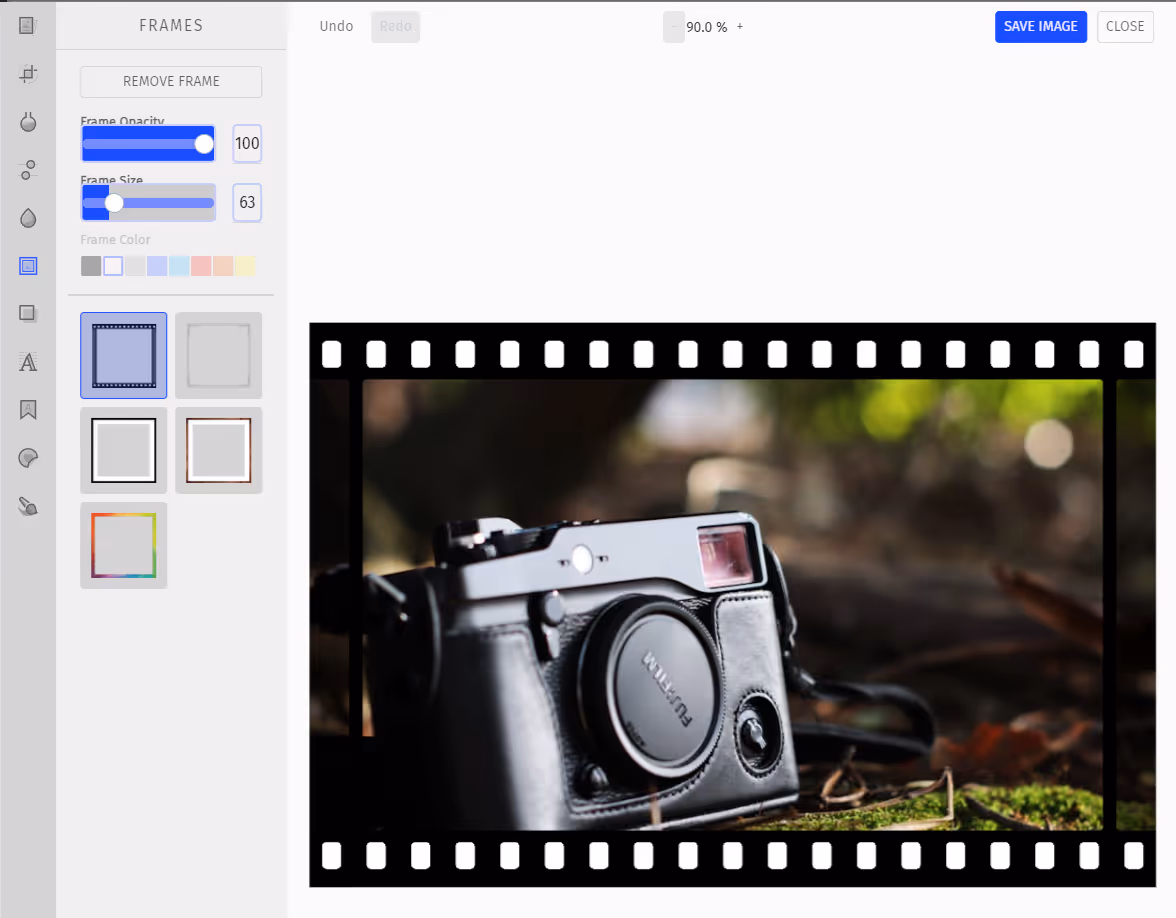
The Frames tool does what you’d expect - adds a visual frame to your image that is cropped appropriately. You can customize the frame after you’ve selected it.
Overlays gives you a range of visual effect overlays to further dial in your image.
What’s cool about this is you can control the overlay blending mode and opacity to create some neat effects.

The Text tool also does what you’d expect - it allows you to add fully customizable text blocks to your image right from within Cloud Campaign. It even has gridlines and snapping to help you lay out your design cleanly!

The Text Design tool takes this further by adding more stylized text options you can customize.

The Stickers tool allows you to add emojis and shapes as graphic elements to your image.

Emojis can be rotated and re-sized, while the shape elements can be re-colored and resized. You can also adjust the opacity of stickers.
Additionally, you can upload custom images as stickers directly from your computer.
This is perfect if you already have custom assets or logos that you use regularly to customize content.
The last tool is the Brush tool, which gives you the ability to paint or draw directly on images. You can adjust brush size, hardness, and color to get the effect you want.

Once you’ve made your image changes, the last thing you’ll want to do is save them.
However, one VERY important thing to remember is that this editing tool is what’s called “destructive.”
While this sounds ominous, all it means is that once your image is saved, all the elements or layers you’ve added become “flattened” or drawn as single image, which cannot be edited or undone.
If you go back into the image you just edited, you’ll notice the new elements are now part of the image and cannot be moved or edited.
This differs from “non-destructive” tools, like Photoshop, where you can go back and undo any changes to the source file and re-export it as a new image.
This small but important nuance can save you and your clients some up-front frustration when using the tool.
You can also create and import content from Canva directly.

Once you’ve created your piece and imported it, you can click the Canva icon to edit the content in Canva - which is non-destructive, so you can edit and save designs any number of times without flattening your images.

Post Captions Walkthrough
If we keep the scroll rolling, we’ll come to the Post Captions section next.

From here, you can compose content manually or use CaptionAI to generate up to 10 social media captions at once.
We’ve also made it easier to add platform-specific captions. Just click the toggle and you’ll see only the connected accounts for that workspace.
Click between the icons to enter your platform-specific captions.

CaptionAI is even more accessible. Just click this tab, enter your prompt, and select your modifiers like tone, and number of posts.

You can also select the platform-specific captions toggle, which applies specific rules to the captions based on the platform.
Publishing Options Walkthrough
The next part of the wizard provides you with publishing options, like Recycle Content and Require Approval. These might change depending on the users permission level.
This is also where you set content expirations and recycling parameters.
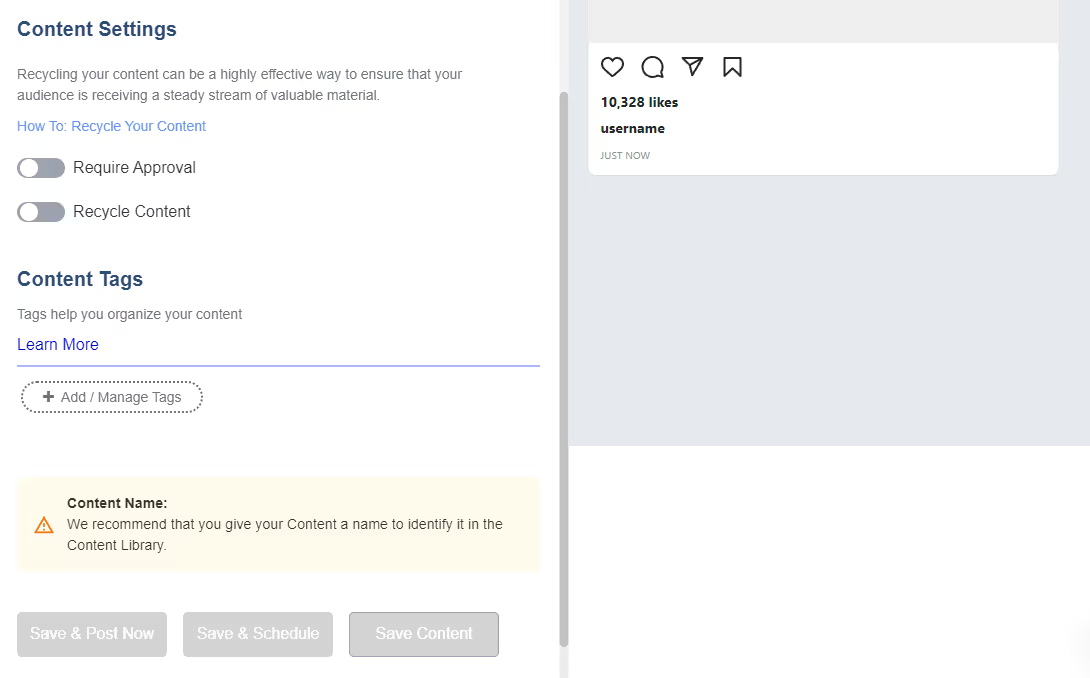
Content Tagging Walkthrough
The last part of the wizard is where you can create and add content tags to your post.
We’ve also included contextual warning notifications that let you know if your content has errors that could prevent it from posting.
From here you can post right away, schedule it for later, or just save it your content library for further editing, approval, or scheduling.
Story Posting Walkthrough

Now let’s check out the Story posting wizard, which streamlines posting to Instagram Stories.
Here you’ll enter the title of your content.
You’ll notice that only your Instagram accounts are available options here.
Select whether you want to post a video or image.
You can give your video a title, which is different from the content title you added above.

This is the title that appears above the video’s caption and in platform search results, so it’s important to give your content a relevant title.
From here, you can select whether you want to post to Instagram Reels only, giving you a finer degree of control on where your content appears.
Next, you’ll apply your approval and recycling settings, content tags, and check for any media errors before posting, scheduling, or saving your post.
Facebook Cover Photo Walkthrough
The last creation wizard in this update is for Facebook Cover Photos.

This is especially useful for agencies managing franchises or multi-location businesses because they can now quickly customize and update Facebook cover photos for lots of clients.
Like before, enter your title for the content library.
Then, select the Facebook account you want to update and add your image.
You can use the built-in image editor to crop and customize the Cover Photo or access Canva to use their templates and design editor.
Cover Photo Captions
Once you’ve added your image, you can compose one or more captions manually or with CaptionAI.

Then, apply any approval or recycling settings and content tags before posting, saving, or scheduling.
Conclusion
That wraps up this walkthrough on the new content creation process within Cloud Campaign!
We hope this new workflow speeds up your content creation process.
What are you waiting for? Log in now to give it a try, and if you aren’t using Cloud Campaign, click here to start your free two week trial today!
Happy posting!